It seems inevitable that as soon as a nerdy type has a baby, he or she finds a way to combine the newfound love of their baby and their love of computers in some way. So here's one from me.
Listening In
My wife and I had our first child last year, and once he started sleep training, we converted my office into his bedroom. Because it was the summer, we had our window-mounted air conditioner running through the night, and it was loud. We needed a way of hearing our son from next door over the sound of the air conditioner. We borrowed a wireless baby monitor from a friend, but it didn't work well at all. My wife suggested we buy a new one.
Now, any time I or someone else suggests spending money on something - anything - I immediately try to think of cheaper or free alternatives. It's just a quirk of my personality; and I must say, it's been a mixed blessing. Part of the reason I got into software development is because programming is free (and has always been a free pasttime). On the other hand, it means that my wife is annoyed with me sometimes when I try to jerry-rig a solution in order to save a hundred bucks.
This was one of those times. Fortunately, she actually liked the result!
I had an old laptop lying around that was perfectly functional, except that the battery was dead, so it had to be plugged in all the time. In this case, that didn't matter. At the time, I was using it to experiment with Arch Linux (which, by the way, was more fun than I expected). I placed it on the shelf next to the crib.
I spent a couple minutes searching online for a program that would be suitable to stream audio from the microphone to the web (local network), but I realized - thanks to a couple answers on Stack Overflow - that it already had the programs I needed. arecord is a small command-line utility that can capture audio from the sound card and pipe it anywhere, which could be a file, or significantly, to the standard out. This meant that I could set up an ssh tunnel between that laptop and one in our room, and have arecord on that computer pipe audio data through the tunnel to aplay on this computer. aplay - as you might have guessed - is the playback counterpart to arecord.
Instant audio baby monitor - and I didn't even have to download a program! Granted, it required two laptop computers, but since they were lying around and otherwise unused, I consider that a free solution.
One last thing I'll mention about this as a sidenote: the ideal sleep environment for babies (and for adults, actually) is pitch black. The screen of the laptop puts off a lot of light - even on the lowest brightness setting and on a black screen. To remedy this, I just used this linux command to deactivate the screen (which I could type into the keyboard, or send remotely): echo 0 | sudo tee /sys/class/backlight/intel_backlight/brightness.
Getting a Better View
Later on, as our A/C usage decreased, and our confidence in our baby's sleep increased, we no longer needed amplification of our baby's crying. However, part of our baby's sleep training involved the "cry it out" method. Babies use crying as a self-soothing mechanism, and it helps them fall asleep on their own. Although this is perfectly healthy and natural for the baby, it's a little distressing to the parents - especially the mother. Also, it means that when the baby cries, you're not sure if he's crying for a different reason - like his leg getting caught between the bars of the crib. So we wanted a video monitor to avoid walking in the room and disturbing him unnecessarily. Again, my wife suggested we buy one. Again, my cogwheels started turning.
The laptop in the baby's room has a webcam on it, but it doesn't work in the pitch black room. Although I didn't have a night vision camera, I did have a raspberry pi zero, and I figured I could make a night-time video monitor for cheaper than it would be to buy one (and it would certainly be more fun). There are a number of accessories for the raspberry pi, one of them is the "NoIR" camera. A play on words with the french word for "black" or "dark", it nevertheless sounds a little weird that it's "no IR", since infrared vision is actually what we want. As it turns out, all webcams can see infrared, but it messes up the image, so the manufacturers add an infrared filter to remove infrared light from the picture. The NoIR camera simply has "no IR" filter, and can therefore see infrared light.
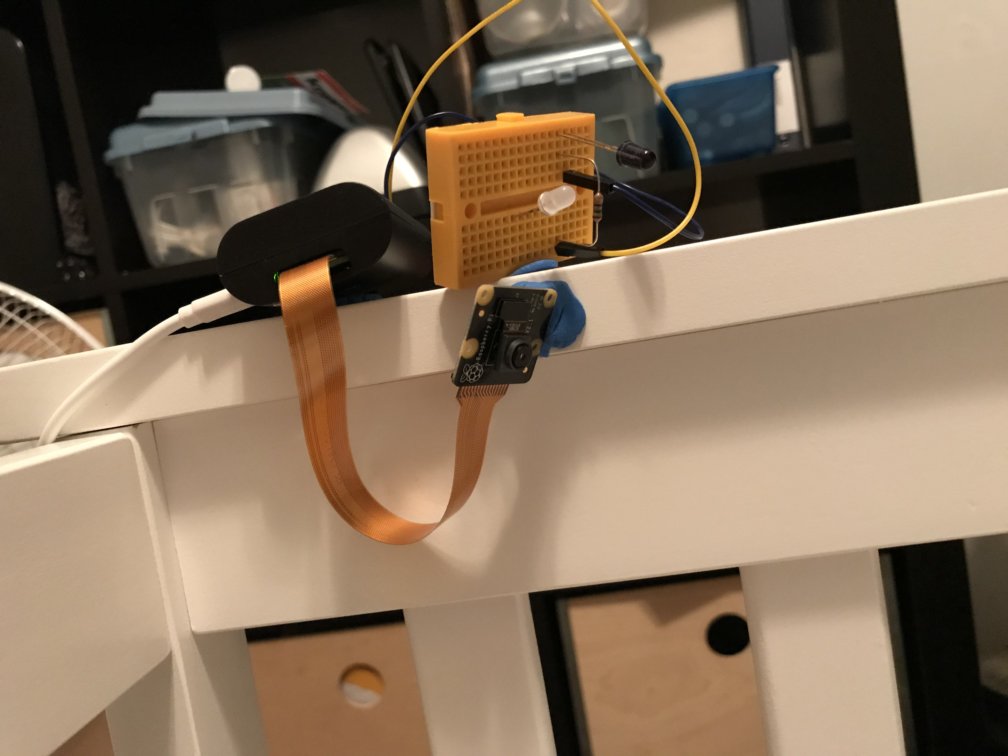
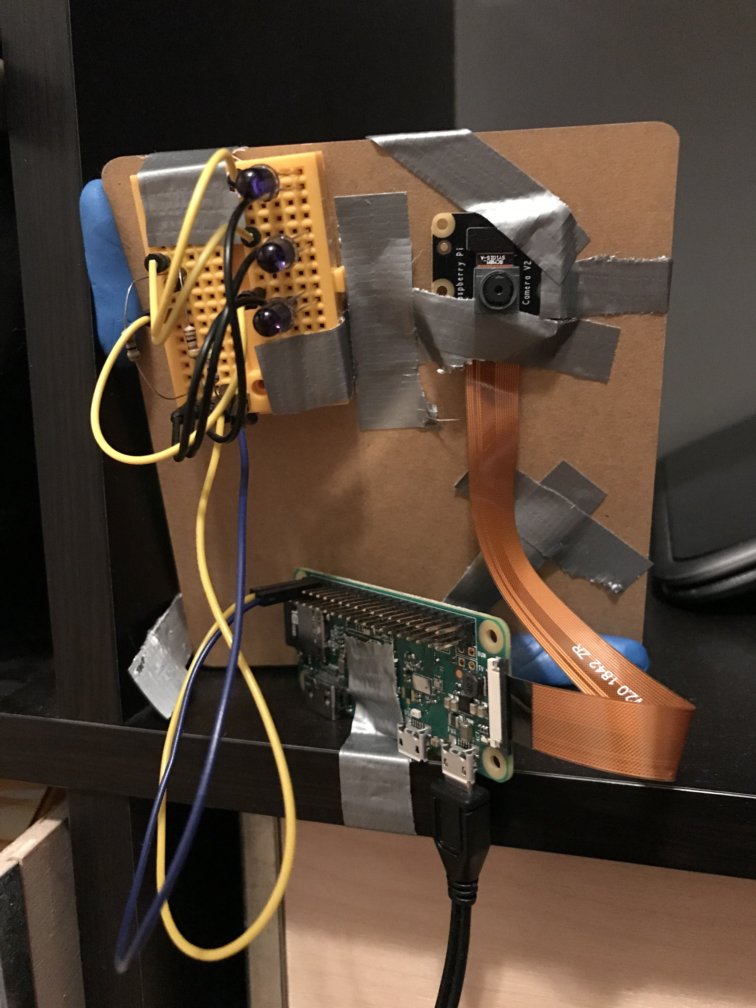
Which led me to the next thing which I needed - a source of infrared light. A pitch-black room - lacking visible light - doesn't have much infrared light either - certainly not enough for the new camera. Luckily, this raspberry pi zero was the model "H", which means it included the jumper pins for its GPIO array. I went down to ABRA, which is the electronics parts store in my city (seriously, it's a toy store for geeks in there), and bought the camera, and a few infrared LEDs. I hooked them up (without needing to solder the wires), and voilà! I could see in the dark.
Originally, I planned to make a fancy case for the pi-camera-LEDs setup, which I could just screw into the wall and plug in. I ended up having neither the materials nor the time, so I just affixed everything in place on the crib using blue tack. When the baby was old enough to reach up to the camera, I taped everything to a board, and placed the board on the shelf - still in sight, but out of reach.
The software side was even easier. Raspberry pi fans will know about motion, which is the go-to camera program for the pi. It's named after its flagship feature, which is hooking into a connected camera, and taking photos when it detects motion (above a certain threshold). This makes it an ideal homemade security system, but it's also a generic camera program. It can take pictures and/or videos at any available resolution, on a schedule, and with a variety of settings. You can play around with the configuration, but these are the particular lines that I modified for my needs:
daemon on- This keeps the program running in the background all the time.width 480- I defined the height and width of the video (photos) to be rather small, to save on processing power and bandwidth; but the camera on the raspberry pi has a very high resolution.height 640framerate 20- This is to make the video fluid, rather than choppy (like an old-school security camera).stream_port 8081- Defines the port to access the video feed.stream_maxrate 24- It appears that the framerate of the feed is defined by the minimum of this andframerate, but I'm not sure about that.stream_localhost off- Turning this off lets me access the feed from another device (in the same network).
Those last three are the most interesting. Motion has a built-in webserver and can stream photos to your device through a browser. You have to know the IP address of the pi, but then you can go to http://192.168.0.104:8081 (for example), and you see an image! More than just an image, in fact, you see 20 images per second (depending on the framerate you set), which is essentially a live video feed. I don't open this port to the public in my router, but if I wanted to watch from outside my network, I can set up an ssh tunnel through another device that is exposed, and it works just as well as if I were in the next room.
Lastly, just like the laptop, the raspberry pi gives off light through its LEDs. A single LED can be especially distracting to a baby trying to sleep, more so if it's blinking intermittently. A dark piece of tape can take care of it, but I can also turn this off programmatically by piping a 1 to /sys/class/leds/led0/brightness. (For some reason, sending a 1 turns the LED off, whereas sending a 0 turns it on. It may have something to do with the resistor that it's attached to, but I honestly don't know.)
Conclusion
As our baby gets older, the need for our baby monitor will go down - until the next baby gets sleep trained, at least. It has worked pretty well. If I were to improve upon it (which I might do), I will add more IR LEDs (I just have to figure out how to hook up more elements to the circuit), and finish the case that I originally planned to make. In the meantime, our little one is sleeping well - which gives the greatest satisfaction of all.